RV SCHOOL: How to Dump Your Black + Gray Tanks
Welcome to RV School! Today, we’re covering the topic everyone tries so desperately to avoid: RV dumping. Specifically, dumping your black and gray tanks. We’re going over it all, in hopes to make the topic seem not so taboo.
For starters, what does RV dumping even mean? What are black and gray tanks anyway? Well, your gray water tank is a tank underneath your RV where all the water and debris from your kitchen sink and shower drains into. The black water tank is the tank underneath your RV where all the water and “debris” from your toilet drains into. This is usually the one everyone feels particularly squeamish toward, but we promise you don’t have to be!
In simpler terms, your black and gray tanks are basically your plumbing. Just like in your own home, but with an RV, the hoses, or tubes, are visible. You wash your hands, take a shower, and do your business the same as any other day, it’s just the disposal of it that is a little different.
While we all think of that nasty, but oh so humorous, the scene in the movie “RV” where Robin Williams is dumping his tanks and everything explodes and rains all over him…we promise that’s not reality, and never will be for you. Because you’ve got us to show you the ropes…or pipes?
In any case, we’re breaking it all down for you, in a safe, and sanitary way, so you’ll look like a pro at your next stop. Here’s how you dump your gray and black water tanks:
What You Will Need:
- Gloves
- Separate water hose (than the one you use for your drinking water)
- RV sewage pipe
- Clear elbow adapter
- Elbow adapter for other end of the sewage pipe
- Hose Support
- Sanitation Spray
Dump Your Black + Gray Tanks
Step 1:
Put those gloves on!
Always dump the black water tank first, as you can use the gray water, and your water hose to flush out any remaining debris at the end. You don’t want anything trickling out once you’re finished!
Take the cap off the black/gray water tank drain (that sits between the two levers). Connect your clear elbow to that same water tank drain. Then, connect the sewage hose to the open end of that elbow adapter.
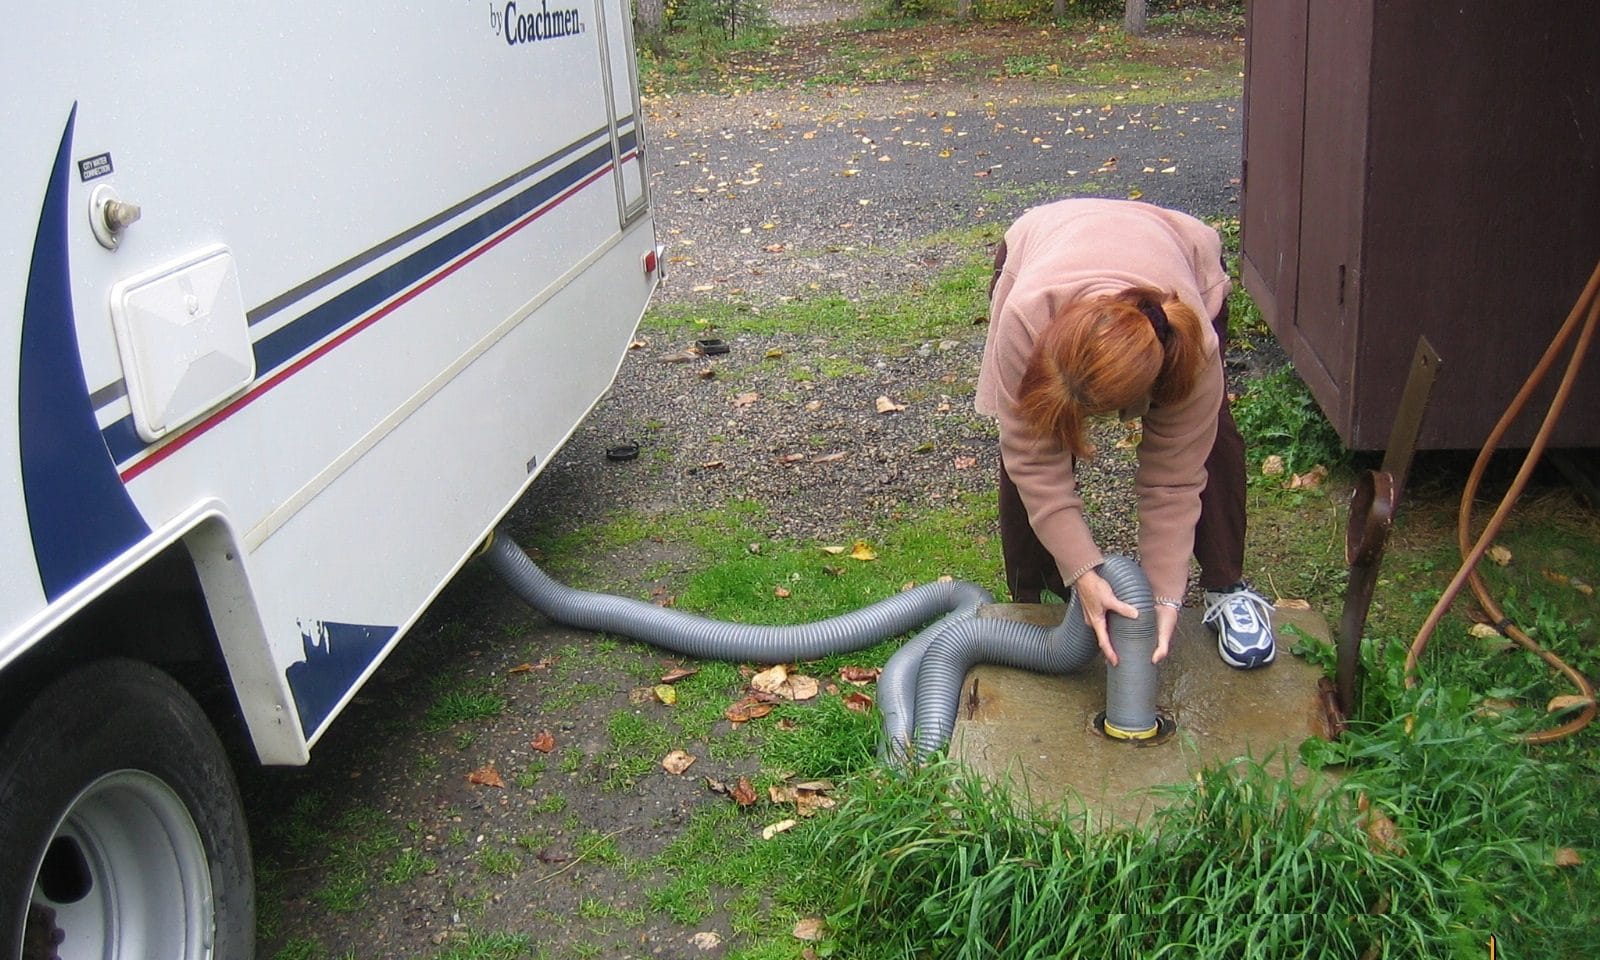
Take your other elbow and attach it to the other end of the sewage hose. Stick that end of the elbow/sewage hose into the designated dump station hole.
If you need, use your hose support by extending it out and running it underneath your sewage hose to create a more natural, gravity fed slope into the RV dump drain.
Step 2:
Pull your gray water tank lever, and watch it pour out into your sewage hose through your clear elbow (just a few seconds). Confirm that there are no leaks, adjust accordingly if so.
Once you’ve confirmed there are no leaks, push that gray tank lever back in all the way. It’s time to pull that black tank lever all the way out. Let it drain completely, until you no longer see any debris coming down through the clear elbow.
With the black tank still open, you will connect your separate water hose to your “black tank flush.” Turn on the water hose, and let it wash out any remaining debris in the tank.
**This process usually takes just a few minutes, but you can tell when it’s finished, when you see clear water start to pour out through that clear elbow adapter to the black tank.
Then, you’ll turn off your water hose. Close the black tank, by pushing the lever all the way back in. Disconnect your water hose from the black tank flush.
Step 3:
Now, you’ll pull your gray water tank lever all the way out, and watch your gray water flush out completely.
Once it’s done draining, close the gray water tank lever by pushing it all the way back in.
Step 4:
Disconnect your sewage hose from the clear elbow. You’ll slip it through the support hole at the bottom of that RV compartment carefully, and stand up with it.
Holding the sewage hose up (waist to chest high, nothing crazy) will act as another triple check to clear anything out of the hose and into the sewage drain.
Once that is finished, set the hose down, and disconnect the clear elbow from the tank. Put the tank cap back on.
Step 5:
As yet another safe and sanitary way to clean out your hose (and to avoid getting any gross stuff on you), turn the water hose back on and rinse the sewage hose one last time.
Stand up with the hose once again to allow that water you used to rinse to drain out.
Run some water from the hose over the connection that is feeding into the actual dump drain too.
Disconnect the elbow from the sewage hose end, and out of the RV dump drain.
Step 6:
Spray all the supplies down with sanitary solution to disinfect. Circle up the sewage hose, collapse the sewage hose support, roll up the water hose, grab those elbow attachments, and put everything back into its rightful place.
And voila! You’ve just safely, successfully dumped your black and gray water tanks in just a few minutes. Now that wasn’t so bad 😉
We know this task isn’t the most glamorous, and might be the most daunting part of the RV experience, but we hope this helped ease your nerves even just a little bit! If you are ever in doubt, or need a little encouragement just refer back to this guide.
Here’s to safe, clean, fun RV travels!


